安装
本教程将指导你完成设置 GitHub Copilot 订阅并在 Visual Studio Code 中安装 GitHub Copilot 扩展。完成这些步骤后,您可以在 VS Code 中开始使用 GitHub Copilot。
步骤 1:设置 GitHub Copilot 订阅
如果要使用 GitHub Copilot,则需要在个人帐户中拥有 GitHub Copilot 的有效订阅,或者需要在组织或企业管理的订阅中分配一个席位。
| 账户类型 | 指示 |
|---|---|
| 个人账户 | 使用个人 GitHub 帐户设置 GitHub Copilot Individual 订阅。您可以激活一次性 30 天试用版来评估 GitHub Copilot。 如果您尚未激活 Copilot 的免费试用版,GitHub Copilot 扩展会在 VS Code 中通知您。  |
| 组织成员 | 您需要由组织所有者为您分配席位。 您可以从个人帐户的 GitHub Copilot 设置请求访问 GitHub Copilot Business。  |
步骤 2:安装 GitHub Copilot 扩展
您可以使用 GitHub Copilot 扩展来支持 VS Code 中的人工智能 (AI) 建议。
安装 GitHub Copilot 扩展
安装 GitHub Copilot 扩展时,还会安装 GitHub Copilot Chat 扩展。
第 3 步:登录 GitHub
要在 Visual Studio Code 中使用 GitHub Copilot,您必须使用有权访问 GitHub Copilot 的 GitHub 帐户登录到 Visual Studio Code。
如果之前未在 GitHub 帐户中授权 VS Code,系统会提示你在 VS Code 中登录到 GitHub:

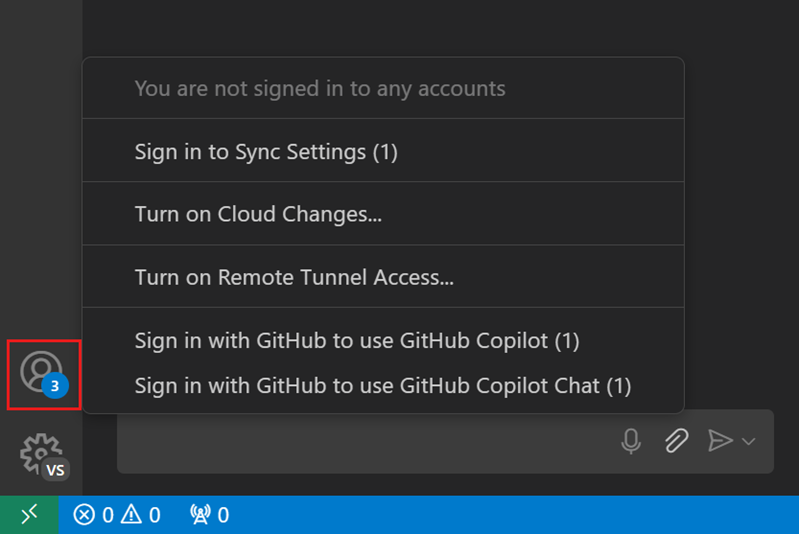
或者,您也可以通过选择活动栏中的“帐户”菜单,然后选择“使用 GitHub 登录”以使用 GitHub Copilot 来登录 VS Code 中的 GitHub。

在浏览器中,GitHub 请求 GitHub Copilot 的必要权限。若要批准这些权限,请选择 Authorize Visual Studio Code。
验证:检查 Copilot 状态
现在,您已经注册了 GitHub Copilot 并激活了扩展,让我们验证一下它是否确实处于活动状态。
- 打开 Visual Studio Code。
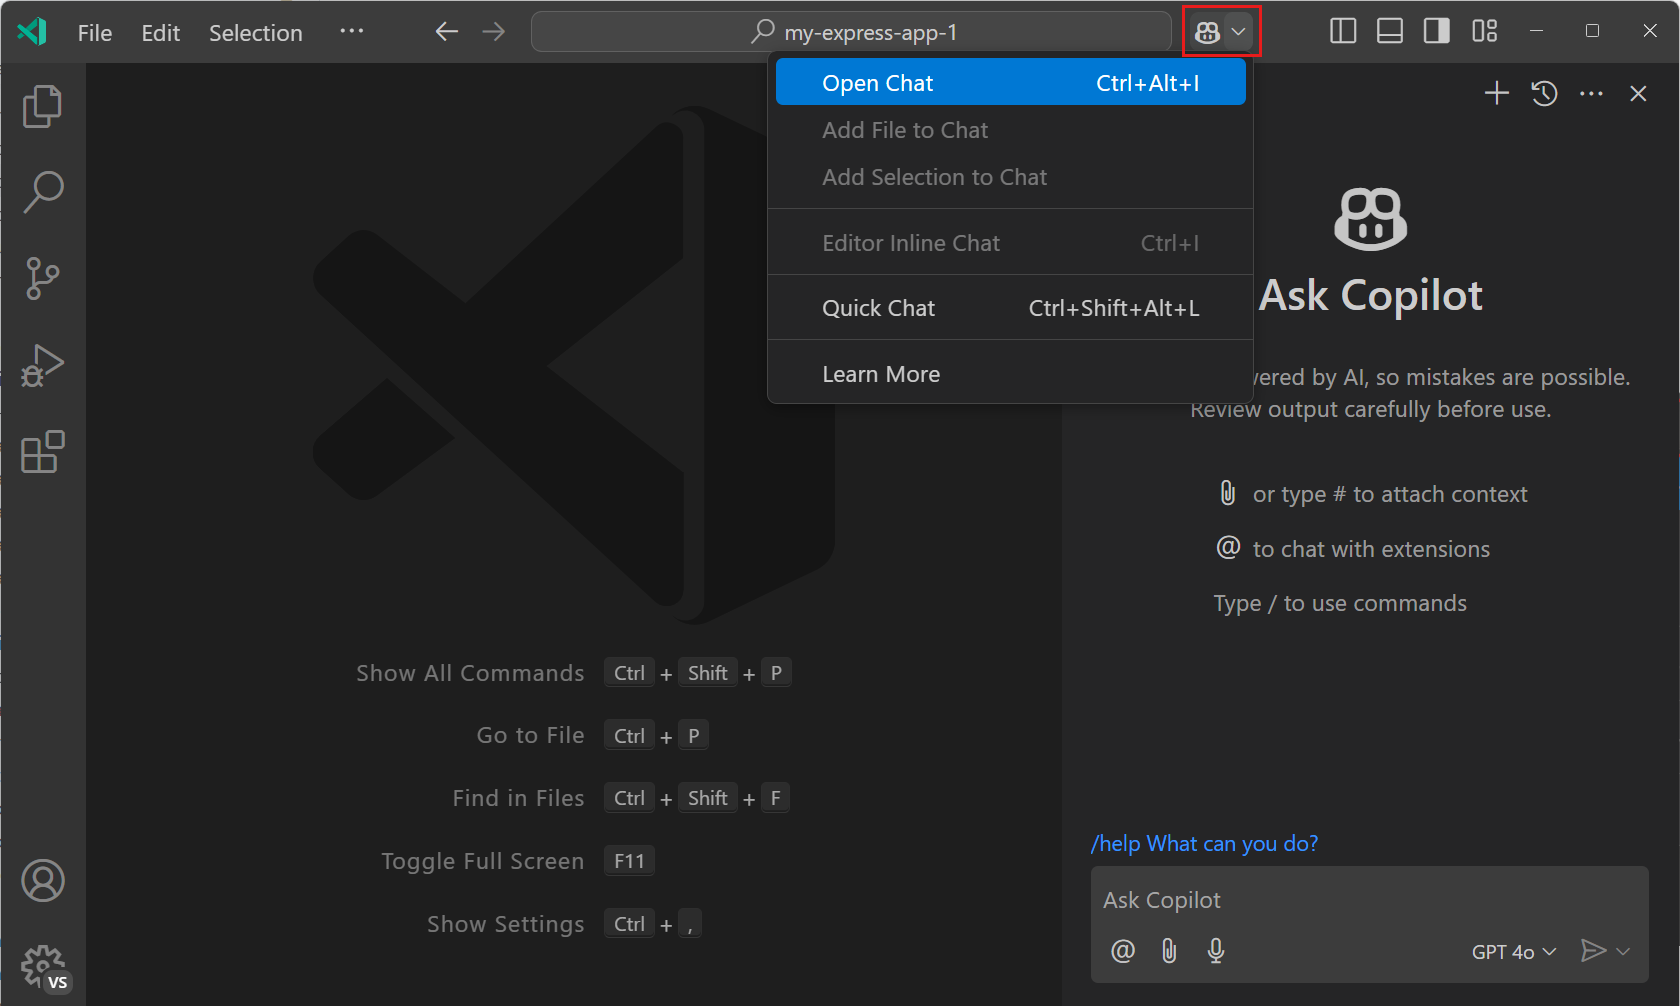
- 请注意命令中心旁边的 GitHub Copilot 图标,通过该图标,您可以快速访问 VS Code 中的 Copilot 功能。

- 选择 Copilot 图标,然后选择 打开聊天 以打开聊天视图。Copilot 聊天视图应在辅助侧栏中打开,您可以在其中与 Copilot 聊天。

注销 GitHub Copilot
如果您的 Copilot 订阅与其他 GitHub 帐户关联,请在 VS Code 中注销您的 GitHub 帐户,然后使用其他帐户登录。
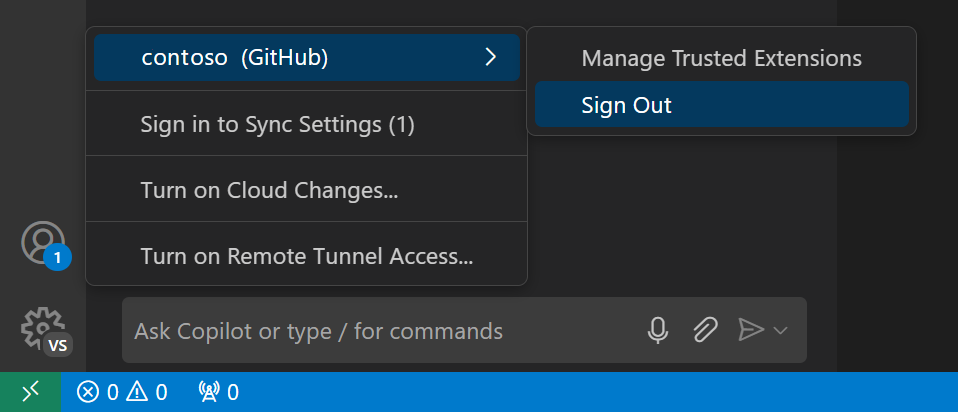
要在 VS Code 中注销 GitHub 帐户,请选择活动栏中的“帐户”菜单,然后选择您当前用于登录的 Copilot 帐户的“注销”。


